The Wiley Research Database add heading page appears as follows.
Click the Add/Edit Headings button to add files under the user home directory.
Follow the steps below to add or edit files:
Step 1: Click the Add/Edit
Headings button.
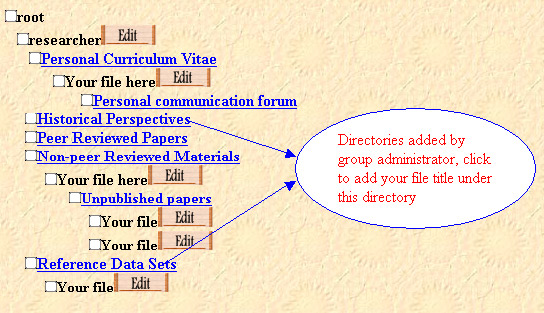
Step 2: Click a
directory name.
Step 3: Type in the filename.
Step 4: Check that the file type matches the extension on
the file to be uploaded.
Step 5: Click the save button.
Step 6: Click the back button to return to your files or the main
page.
Here is an example:
Step 1: Click the Add/Edit Headings
button.
The Wiley Research Database add heading page appears as follows.
Step 2:Click a directory
name.
An Add information window will pop out like follows:
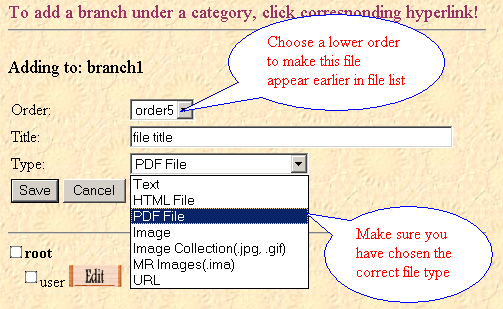
Order description:
The order field is a prefix to the Title, then the whole string is sorted alphanumerically. Choose a lower order to make the branch displayed on the upper tree list. Files are alphabetical in a given order.
Type description:
Step 3: Type in the filename you want
Step 4: Check that the file type matches the extension on the file to be uploaded.
Step 5: Click the Save or Cancel button to finish adding.
Step 6:
Now you can edit the file title through the edit button.
Following is an example page after some headings are added:
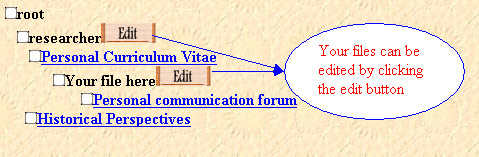
Step 7:After the Edit button is clicked, the Edit information window will pop out as follows:
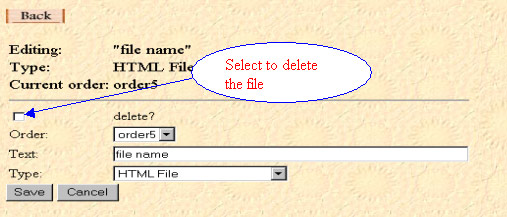
The Order, Text, Type boxes are the same as the Order, Title, Type boxes in Add information form.
Delete description:
If the delete box is checked for a file, the file will be deleted. If it is checked for a directory, all the directories and files in this dorectory will be deleted.
Step 8: Click Save or Cancel button to finish
Adding/Editing.
Step 9: Click Back button
to go back to main window.
![]()